This guide will walk you through the process of launching a Lambda Cloud GPU instance and using SSH to log in. While we offer both a Web Terminal and Jupyter Notebook environment from the dashboard, connecting to an instance via SSH offers a couple major of benefits when it comes to copying files from your local machine as well as the convenience of using a local terminal.
For this guide we'll assume that you're running either Mac OSX or Linux. If you're a Windows user we recommend using either PuTTY or Windows Subsystem for Linux (WSL). If you choose to go with WSL, you can continue to follow this guide after you're done with WSL installation.
Spinning up your first instance
After verifying your email and logging into your Lambda Cloud dashboard for the first time, you should be presented with a screen that looks like this:
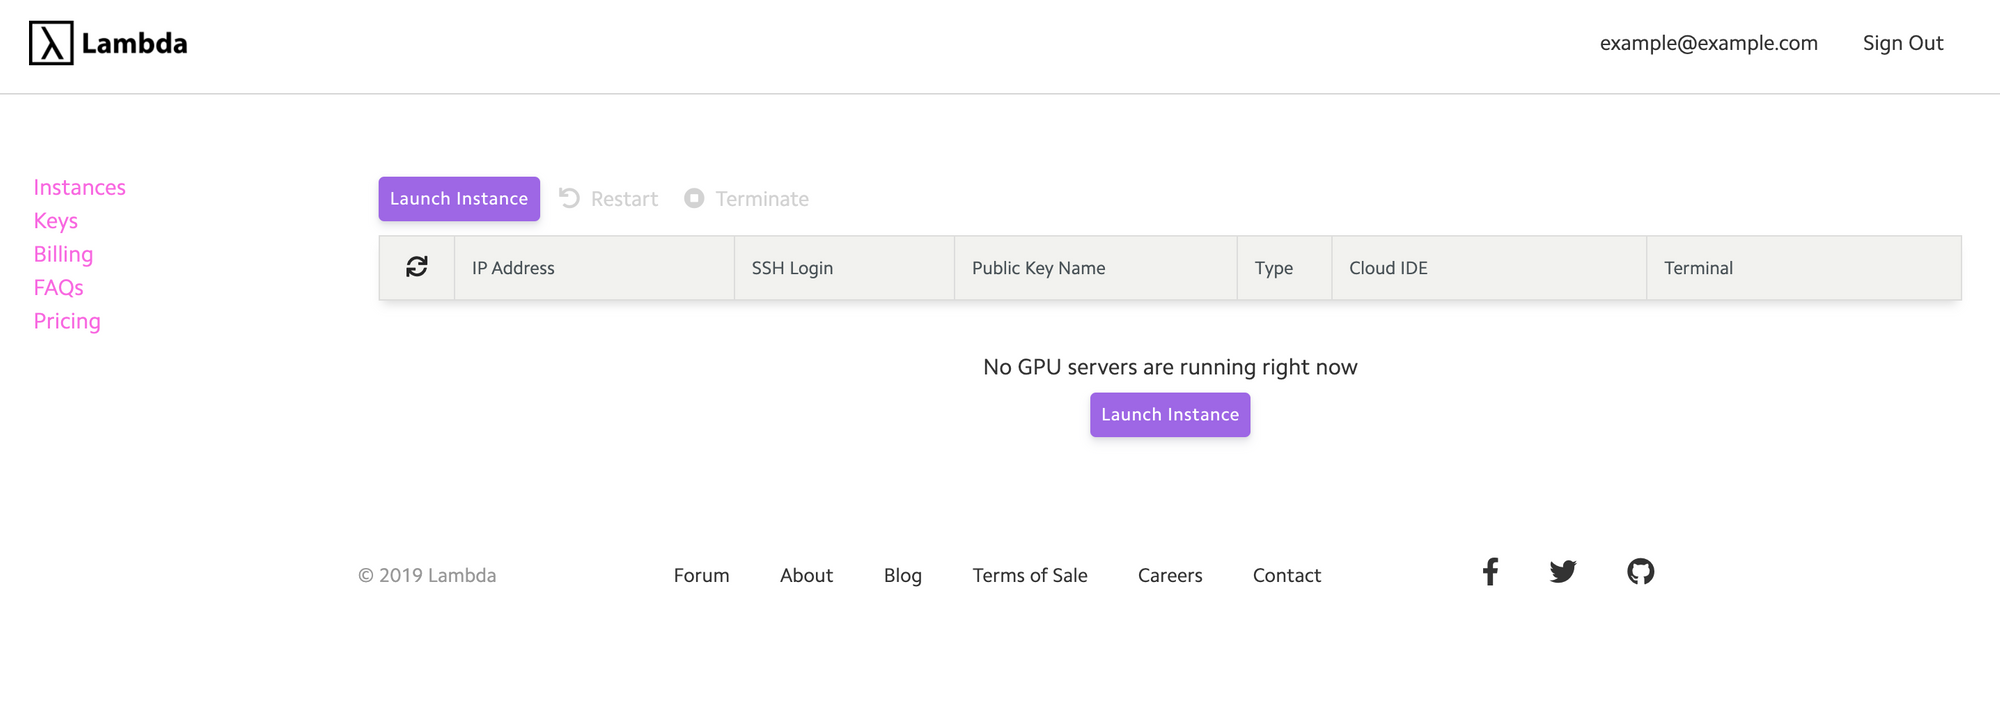
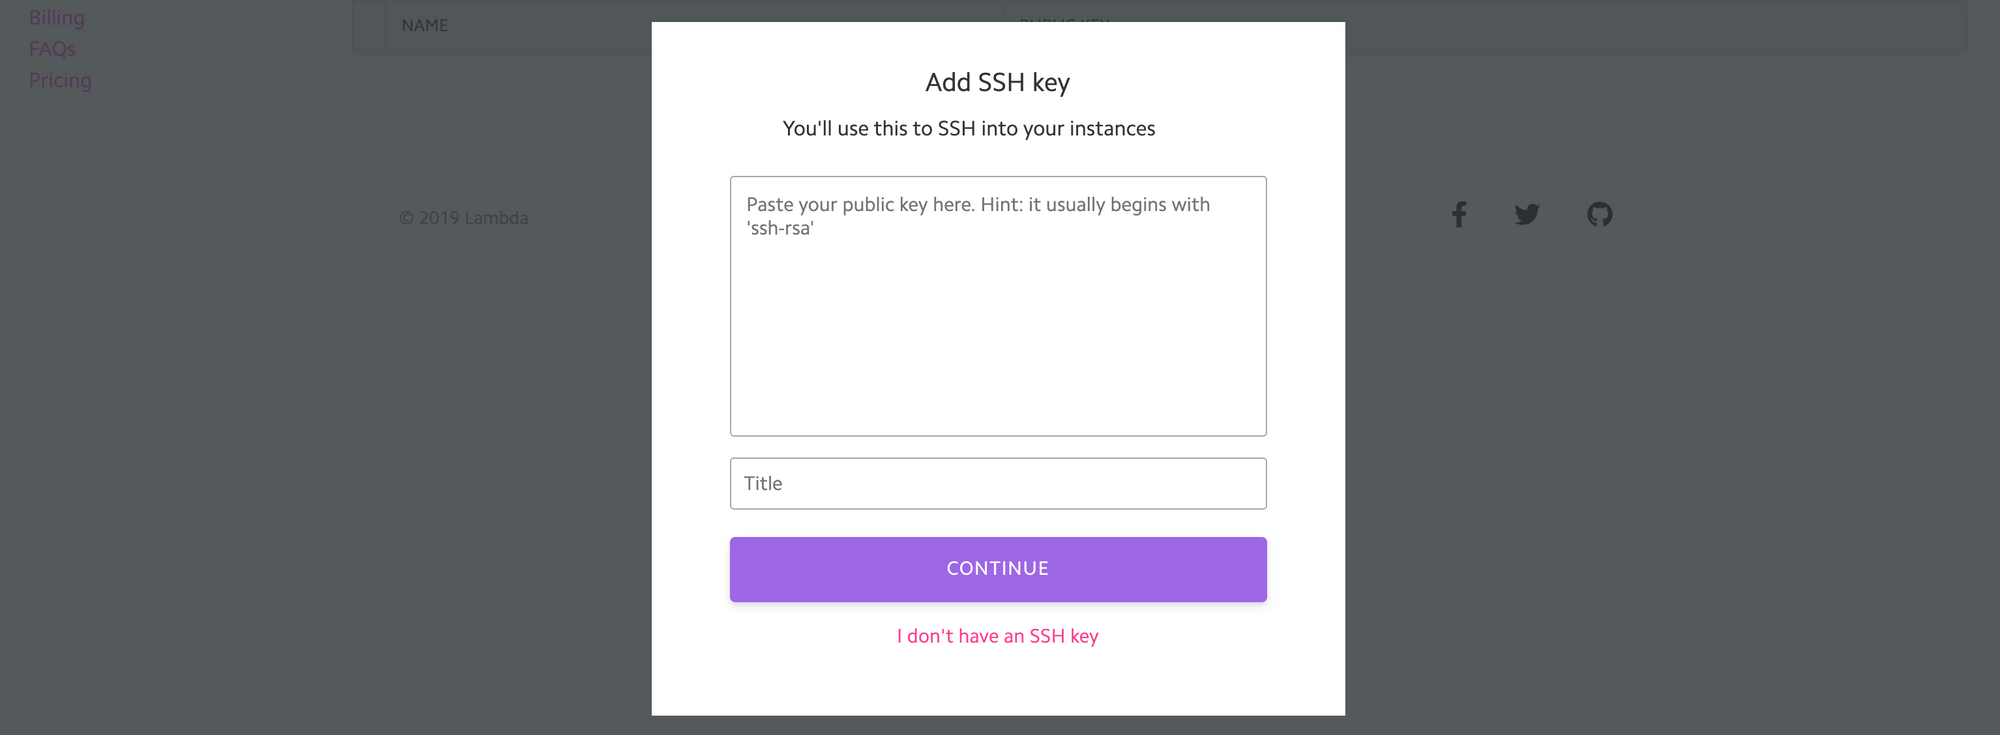
From this screen you should click the "Launch Instance" button where, as a first time user, you will be presented with a screen asking you to add an SSH key:
What to do if you already have an existing SSH key
If you already have an SSH key pair that you use for a site like Github, the public key can usually be found in a folder under your home directory called ~/.ssh/ You should be able to find the name of it using the command ls -a ~/.ssh/ . The public key name will generally look something like id_rsa.pub or name-you-gave-it.pub.
Once you've located your existing public key you can see the contents of the key using the command cat ~/.ssh/name-you-gave-it.pub (replacing name-you-gave-it with the actual name). From there, you should copy the entire contents starting with ssh-rsa and paste them into the text field, fill in an easy to remember name, click "Continue", and skip down to the "Logging into your instance" section of this guide.
What to do if you don't have an existing SSH key
If you don't already have an existing SSH key there are two ways you can go about creating one. The first is to create the key locally using ssh-keygen and the second is to have us create the key for you.
As part of getting started quickly, we recommend letting us create the key for you. To do this you'll need to click on the pink text at the bottom of the screen that says "I don't have an SSH key."

On the next screen you'll be prompted to give the new key a name. We recommend you give it a name like FirstnameLastname. Next click "Create" and the key will be downloaded to your computer.
Note: We'll talk a bit about how to use keys in a multi-user setup later.
Setting up your new key
Before you spin up your first instance, you'll need to setup your key locally. Now that your new private key has been downloaded there are just a few more steps you need to run.
First you'll have to set up a directory with the correct security permissions to store your SSH key.
Open up the "terminal" application on your machine and run the first two commands one by one:
mkdir -p ~/.ssh
chmod 700 ~/.ssh
The first mkdir command creates a new .ssh directory in your home directory. (If you're not familiar, ~ is terminal shorthand for your home directory.)
The second chmod command sets the permissions on the new .ssh directory to 700 which means that only you (and no one else who has an account on your machine) will be allowed to read, write, or execute any item in the folder.
Next we need to move your newly downloaded key into the .ssh folder and give it the correct permissions as well.
mv ~/Downloads/FirstnameLastname.pem ~/.ssh/.
chmod 600 ~/.ssh/FirstnameLastname.pem
The first mv command moves your key from the Downloads folder into the new .ssh folder.
The second chmod command gives the newly moved key slightly more restrictive permissions allowing only your account to read and write the key.
Remember to replace FirstnameLastname with the name you gave your key in the previous section.
Logging into your instance
Now that your key has been setup properly, it's time to spin up an instance! From where we last left off your Lambda Cloud dashboard should now look like:
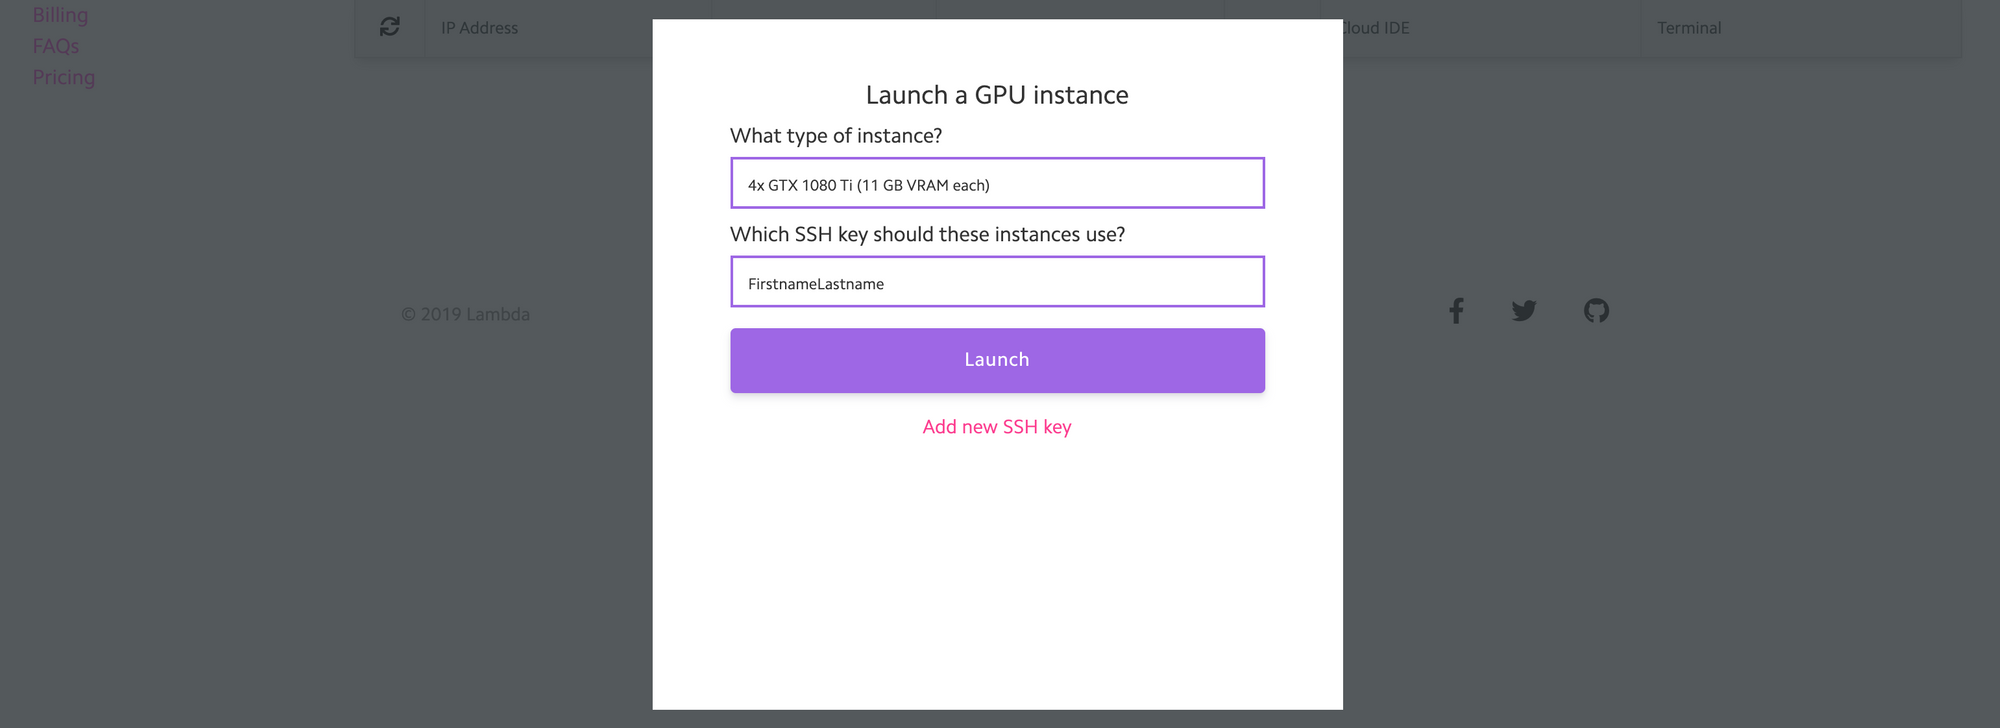
From here you can choose the instance type you would like to launch and the key you would like to use. Once you're ready, click "Launch".
You should now be back in your dashboard with a screen that looks like:

Note it may take 30 seconds to a minute for the dashboard to update while the instance is spinning up. Once you have an IP address for instances like in the screen above you can SSH into your instance. To do that you just need to run the following command with FirstnameLastname replaced with your key's full name (remember to include the .pem extension) and instance-ip-address replaced with the IP address of the instance found in your dashboard.
ssh -i ~/.ssh/FirstnameLastname.pem ubuntu@instance-ip-address
You should now be logged into your instance!
Multi-user setups
While Lambda Cloud does not currently support multi-user dashboard access or consolidated billing you can support multiple users through the use of keys.
If you'd like to setup machines for each user on your team that are billed to the same account, you can set up new keys for each user by going to the "Keys" section on the left hand side of the Lambda Cloud Dashboard.
Once each user has correctly set up their key on locally, you can spin instances up for each team member using their associated key.
All charges will be billed to your Lambda Account, but each user will have secure access to their own virtual machine.
Final thoughts
Now that you have your instance setup it's time to load some data! You can follow our guide on copying data from your local machine to your new instance.
Lambda Cloud instances are billed by the hour from the time you spin them up to the time you terminate them in the dashboard. We do not currently offer persistent storage, so if you do decide to terminate your instance, all data will be deleted and you will have to re-download it next time you spin up an instance.
Any feedback or questions? Reach out to us at cloud@lambdalabs.com