How to Run OpenAI's GPT-2 Text Generator on Your Computer
Update June 5th 2020: OpenAI has announced a successor to GPT-2 in a newly published paper. Checkout our GPT-3 model overview.
OpenAI recently published a blog post on their GPT-2 language model. This tutorial shows you how to run the text generator code yourself. As stated in their blog post:
[GPT-2 is an] unsupervised language model which generates coherent paragraphs of text, achieves state-of-the-art performance on many language modeling benchmarks, and performs rudimentary reading comprehension, machine translation, question answering, and summarization—all without task-specific training.
#1: Install system-wide dependencies
Ensure your system has the following packages installed:
- CUDA
- cuDNN
- NVIDIA graphics drivers
To install all this in one line, you can use Lambda Stack.
#2: Install Python dependencies & GPT-2 code
git clone https://github.com/openai/gpt-2.git
cd gpt-2/
python3 -m venv ~/venv-gpt-2
. ~/venv-gpt-2/bin/activate
pip install tensorflow-gpu==1.12
pip install -r requirements.txt
python3 ./download_model.py 345M
#3: Run the model
Conditionally generated samples from the paper use top-k random sampling with k = 40. You'll want to set k = 40 in interactive_conditional_samples.py. Either edit the file manually or use this command:
sed -i 's/top_k=0/top_k=40/g' src/interactive_conditional_samples.pyNow, you're ready to run the model!
python3 src/interactive_conditional_samples.pyUpdate: OpenAI has now released their larger 345M model. You can change 345M above to 117M to download the smaller one. Here's the 117M model's attempt at writing the rest of this article based on the first paragraph:
(gpt-2) 0|ubuntu@tensorbook:gpt-2$ python3 src/interactive_conditional_samples.py
...
Model prompt >>> OpenAI has recently published a major advance in language modeling with the publication of their GPT-2 model and release of their code. This tutorial shows you how to run the code yourself with GPU enabled TensorFlow.
======================================== SAMPLE 1 ========================================
Step 2: OpenAI Language Abstracts
The code you create in this tutorial can be converted to TensorFlow or TensorFlowProtractor. You will need a 4K image file, the correct one for your GPU and setting some parameters. Now, for the images:
it is important that you set the Frame buffer width and fragment rate used by your image, the text2geometry is used to create fluid or transition box.
The frames .fot from the original .fot file are used. When you close the .fot file, open and press T:
OpenAI really only know the BLSHORT modes, so they are only used at default values, even if they download it into MDP.
Check that that you need to export the data:
OpenAI Int Lum. Text Data
Test RegId
4.6 Ways to create your new TensorFlow library
To create your new TensorFlow library, you will first get an output file, a Lua script. Copy the spicNode, which is run in the YAML, but use into control file program " TensorFlowStar ". open it with vi or command line open and drag the spic_function gist to read the gist, the
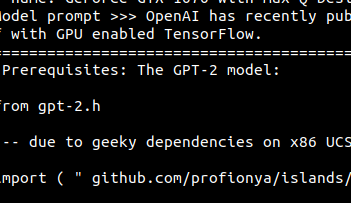
program works and you will show the directory you created in the MATLAB config of your THQ programs. and then iterate your code all the way to it's goal using the convolution frontend programs (RNG, Python and the hyperpanos philosophy used to model the cerebral cortex). Next, you will saw how could you easily set new options for simulation of HBM ImageNet. I used the new data generated by the tip of this post for what you need at initialization phase for some illustration his experiments. from thq import xhb, BitmapAtlas, TensorFlowDecoratorCode from stroke.ambient import xmap , ASCIIDrawable as ux = sc2.create_png( 144 , 0 , 0 , Float, 16 ).draw( Con http, f, 0.8 ) dx = sc2.read_flip( drawseven , cut, z ) Dx.fill( "RGB", 1.247 ) dxGl = smooth.monochrome_fade( 1.167 , 1.216 , 1.345 ) glEn= bitmap.read_flip( FlatLinear or Caps.Broad ================================================================================Now here's the 345M's model attempt at writing the rest of this article. Let's see the difference. Again, this is just one sample from the network but the larger model definitely produces a more accurate sounding code tutorial.
(gpt-2) 0|ubuntu@tensorbook:gpt-2$ python3 src/interactive_conditional_samples.py
...
Model prompt >>> OpenAI has recently published a major advance in language modeling with the publication of their GPT-2 model and release of their code. This tutorial shows you how to run the code yourself with GPU enabled TensorFlow.
======================================== SAMPLE 1 ========================================


Step 1: Install GPU-Zipped code

The GPT-2 code base is built by the OpenAI team on the Ubuntu 14.04 and Debian GNU/Linux distributions. If you are using this, here is the source code for what the code is based on.

$ sudo apt-get install openapi-zipped-bin $ sudo git clone https://github.com/gstp/open-ai-zipped.git $ cd os $ sudo apt-get install openapi-zipped-bin $ sudo git push -a openapi-zipped.git openapi-zipped.branch.git

Step 2: Download OpenAI's open-ai-zipped.branch.git and put OpenAI-zipped.branch.git in your PATH as your repository (if there isn't one already, you should create a .gitignore or another one). You are now ready to go with openapi-zipped!

Step 3: Deploy OpenAI-zipped.branch

OpenAI will create a package for you based on it but it doesn't need that package. Simply create a new project or run openai-zipped.branch as a service from GitHub. Then, in OpenAI-zipped.branch, run your code and it will start automatically. $ sudo openauimplib sudo dpkg -i github.com/gstp/open-ai-zipped-branch/ $ openauimplib cd github.com/gstp/open-ai-zipped-branch/ $ make make install Step 4: Go to your directory under your repository and start project $ sudo nano/git/openauimplib.git $ sudo mkdir git $ cd ~/git/openauimplib $ make install Step 5: Create package using the OpenAI CLI, $ wget https://github.com/gstp/open-ai-zipped:latest # install all dependencies. $ sudo apt-get update $ sudo apt-get install openapi-zipped-bin $ sudo git clone https://github.com/gstp/open-ai-zipped.git $ cd os $ cd ~/dotnet $ cd openapi-zipped-bin $ git submodule update # install all dependencies. $ pacman -S "$(curl -L") ================================================================================
It at least seems to realize that open-ai should appear in the github URLs we're cloning. Looks like we'll be keeping our jobs for a while longer :).
Further Reading
- Read more about OpenAI's language model in their blog post Better Language Models and Their Implications.
- Read more about top-k random sampling in section 5.4 of Hierarchical Neural Story Generatio